15% Off Selected iFixit Tools<\/a> \u2014 Limited Time<br\/>\nFree Shipping on Domestic Orders $75+<\/p>","createdAt":"2026-06-15T16:37:24.835Z","updatedAt":"2026-06-16T07:34:16.264Z","publishedAt":"2026-06-16T07:34:16.302Z","locale":"en","documentId":"s1gcjvoe15hdc1os0ndw1ggb"}}">

15% Off Selected iFixit Tools — Limited Time
Free Shipping on Domestic Orders $75+

How to Repair Wood Dents with Wood Filler

What you need

  1. How to Repair Wood Dents with Wood Filler, How to Repair Wood Dents with Wood Filler: step 1, image 1 of 1
    • Inspect the damage in the wood and determine how much wood filler will be needed.

    • A shallow dent in the wood will require less wood filler than a dent with deeper damage.

    Ask FixBot

    Add Comment

  2. How to Repair Wood Dents with Wood Filler: step 2, image 1 of 1
    • Smooth the surface where the damage was by scraping off the splinters using a 50 mm wide putty knife blade.

    • Use the corner of the blade to smooth over the bumps.

    Ask FixBot

    Add Comment

  3. How to Repair Wood Dents with Wood Filler: step 3, image 1 of 1
    • Apply Elmer's Carpenter's Color Change Wood Filler to the putty knife and smear onto the surface.

    • An 8 ounce can of Elmer's Wood Filler will suffice for many repairs.

    Ask FixBot

    Add Comment

  4. How to Repair Wood Dents with Wood Filler: step 4, image 1 of 1
    • Allow the filler to dry.

    • Shallow damages can take thirty minutes to an hour to dry.

    • Deep damages take up to two hours.

    Ask FixBot

    Add Comment

  5. How to Repair Wood Dents with Wood Filler: step 5, image 1 of 1
    • Sand the dry surface using a 3M 75 mm wide fine-grit sandpaper.

    • Before sanding the surface, make sure the wood filler has dried by touching the wood filler.

    Ask FixBot

    Add Comment

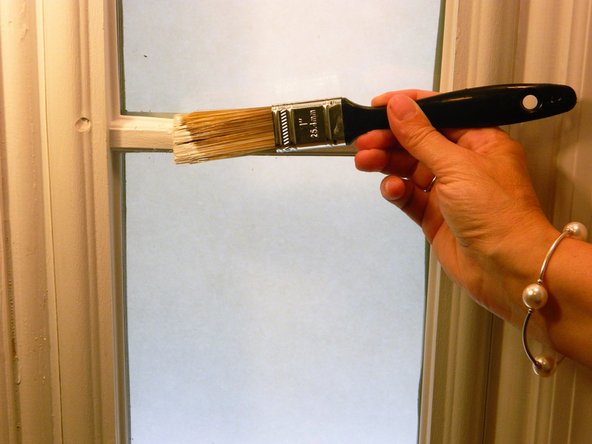
  6. How to Repair Wood Dents with Wood Filler: step 6, image 1 of 2 How to Repair Wood Dents with Wood Filler: step 6, image 2 of 2
    • Apply Minwax Wood Finish Stain to the wood using a 25 mm stain brush.

    • Allow the stain to soak the surface for a few minutes so the wood absorbs it well.

    • An 8 ounce can of stain will suffice for this repair.

    • Optional: The 25 mm stain brush can be replaced with a regular 25 mm cloth brush found at home.

    • Multiple coats may be applied to reach the desired color.

    Ask FixBot

    Add Comment

  7. How to Repair Wood Dents with Wood Filler: step 7, image 1 of 1
    • Optional: Paint the surface with white paint from a can of Rust-Oleum if the stain is not the desired color for the surface.

    • Use a 25 mm paint brush and an 8 ounce can of Rust-Oleum.

    • Multiple coats map be applied to reach the desired color.

    Ask FixBot

    Add Comment

  8. How to Repair Wood Dents with Wood Filler: step 8, image 1 of 1
    • Dry the surface by patting the surface with a cloth towel.

    Ask FixBot

    Add Comment

Conclusion

If the damage is still visible, then follow steps 1 through 8 again until the damaged area matches the rest of the wood. I hope this guide was helpful!

Cancel: I did not complete this guide.

Nicole See

Member since: 01/16/17

161 Reputation

1 Guide authored

1 Guide Comment

Thank you for sharing this post

تعمیرات مبل کسری - Reply Share

Add Comment

View Statistics:

Past 24 Hours: 3

Past 7 Days: 27

Past 30 Days: 89

All Time: 6,891